目录
前言
Apache Spark是一个开源的分布式计算框架,最初是由加州大学柏克莱分校AMPLab所开发。正如其首页(spark.apache.org)描述的一样:Lightning-fast unified analytics engine(快如闪电的统一分析引擎),目前已经在各大互联网公司得到了大规模应用,至少在Apache Flink发力离线处理以前Spark还将在未来一段时间内继续占据主导地位。此外Spark还建立了完备的技术栈,涵盖Spark Streaming/Struct Streaming,Spark SQL,MLlib,Graphx。

为了能够满足用户的不同需要,Spark也支持Spark On Yarn, Apache Mesos, Kubernetes, standalone或者cloud多种部署模式,为了提高资源利用率一般会选择Spark On Yarn模式进行部署以分享CPU、内存、磁盘等资源。Spark任务提交方式会随着部署模式的不同而所有差异,提交任务的相关有效参数也会有所增减,本文对于Spark任务提交方式的分析将基于Spark On Yarn部署模式进行展开,同时也会提供一些Debug期间的小技巧。
运行环境
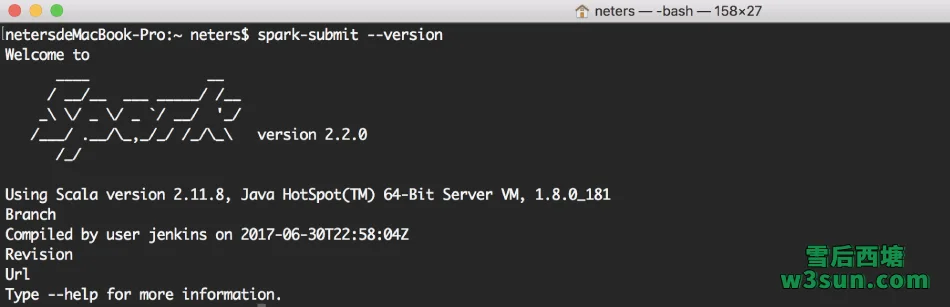
本文中源码部分将基于spark-2.2.0-bin-hadoop2.7.tgz进行分析。
Spark On Yarn任务提交脚本解析

Spark提交任务时会调用spark-submit进行任务提交,在分析整个启动流程之前,可以通过一个Spark随机示例宏观上了解一下启动的过程。一个典型的示例就是SparkPi通过迭代计算获取圆周率π的近似值:
localhost:bin neters$/bigdata/spark/bin/spark-submit \
--class org.apache.spark.examples.SparkPi \
--master yarn \
--deploy-mode cluster \
--driver-memory 4g \
--executor-memory 2g \
--executor-cores 1 \
--queue default \
/bigdata/spark/examples/jars/spark-examples_2.11-2.2.0.jar \
1000
当输入上述启动命令完毕后可以从下图看到程序启动后会“Connecting to ResourceManager”,随后”Requesting a new application from cluster with 26 NodeManagers”…….,一系列和Yarn交互完毕后”Submitting application application_1544777537685_1094 to ResourceManager”,此时任务提交成功整个流程结束,随后Client会定期汇报任务的执行情况。
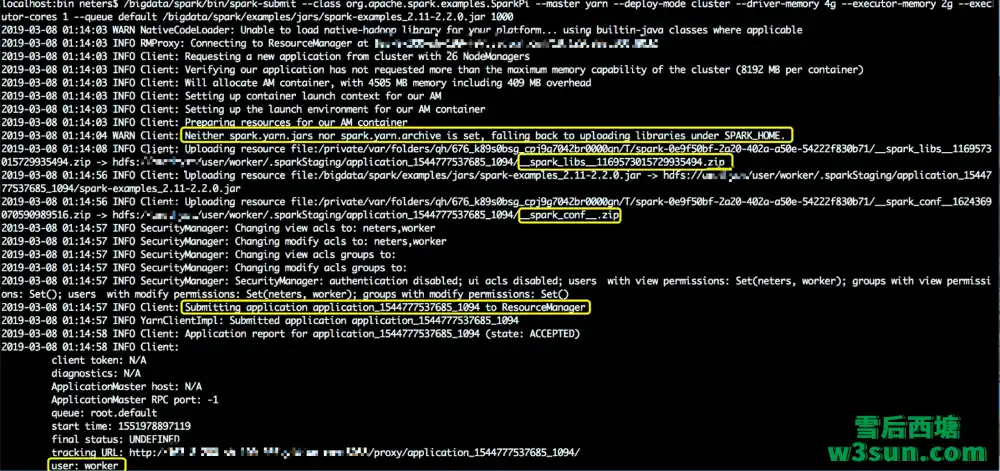
同时从上图可以发现,在任务提交的某个时间似乎是上传了Spark二进制文件目录中的library、任务执行时所需配置、用户jar包,同时执行用户此时是worker为什么不是宿主机用户neters?Spark任务不通过gateway而是在开发人员电脑上就可以提交?下面本文将结合整个启动流程前的准备工作,启动参数解析,启动流程分析进行详细讲解。要保证Spark任务本地提交实际上还需要设置Hadoop的一些配置文件,同时在本地terminal还需要进行了一些变量设置以方便我们进行一些Debug操作:

本地电脑上已经存在Hadoop二进制安装包,同时把生产集群中yarn-site.xml,core-site.xml,hdfs-site.xml拷贝到本地Hadoop配置文件所在目录并覆盖默认配置即可在本地对生产集群进行相应的操作。Hadoop分布式文件系统实现了一个和POSIX系统类似的文件和目录的权限模型。每个文件和目录有一个所有者(owner)和一个组(group)。文件或目录对其所有者、同组的其他用户以及所有其他用户分别有着不同的权限。为了能够保证拥有相关权限,需要对Hadoop权限认证进行一次欺骗,直接export一下默认用户即可。这也是为什么可以不通过gateway而通过本地操作集群的原因,但是上述方式只适合Debug或者临时测试使用,不建议提交生产任务使用这种方式,这种方式对集群管理存在不可控性。接下来继续分析Spark任务提交脚本:
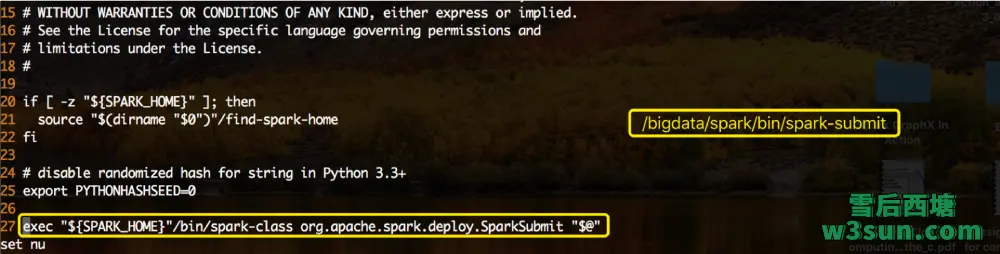
其中除了确定SPARK_HOME设置意外以外,真正执行任务提交的是:
exec "${SPARK_HOME}"/bin/spark-class org.apache.spark.deploy.SparkSubmit "$@"
org.apache.spark.deploy.SparkSubmit任务提交主类和任务相关设置的参数”$@”都传递给了spark-class脚本:
# The launcher library will print arguments separated by a NULL character, to allow arguments with
# characters that would be otherwise interpreted by the shell. Read that in a while loop, populating
# an array that will be used to exec the final command.
#
# The exit code of the launcher is appended to the output, so the parent shell removes it from the
# command array and checks the value to see if the launcher succeeded.
build_command() {
  "$RUNNER" -Xmx128m -cp "$LAUNCH_CLASSPATH" org.apache.spark.launcher.Main "$@"
  printf "%d\0" $?
}

# Turn off posix mode since it does not allow process substitution
set +o posix
CMD=()
while IFS= read -d '' -r ARG; do
  CMD+=("$ARG")
done < <(build_command "$@")

COUNT=${#CMD[@]}
LAST=$((COUNT - 1))
LAUNCHER_EXIT_CODE=${CMD[$LAST]}

# Certain JVM failures result in errors being printed to stdout (instead of stderr), which causes
# the code that parses the output of the launcher to get confused. In those cases, check if the
# exit code is an integer, and if it's not, handle it as a special error case.
if ! [[ $LAUNCHER_EXIT_CODE =~ ^[0-9]+$ ]]; then
  echo "${CMD[@]}" | head -n-1 1>&2
  exit 1
fi

if [ $LAUNCHER_EXIT_CODE != 0 ]; then
  exit $LAUNCHER_EXIT_CODE
fi

CMD=("${CMD[@]:0:$LAST}")
exec "${CMD[@]}"
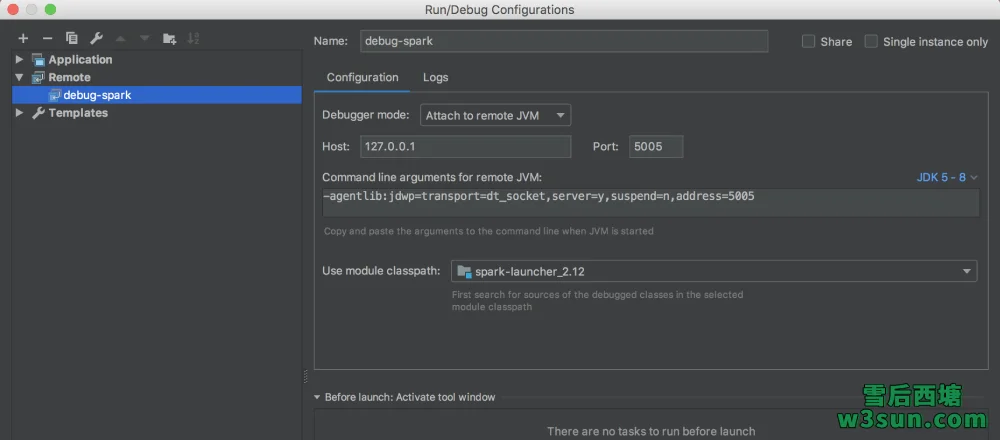
其实真正的执行过程是从build_command() function开始,它首先会调用org.apache.spark.launcher.Main对spark-submit中的所有参数进行解析,确认无误后会将解析的信息反馈给控制台同时将反馈退出码,控制台此时接收解析过程打印的命令数组,为了能够exec任务提交的完整命令还需要将退出码从命令数组中移除掉。为了方便分析流程,采用远程Debug方式进行跟进,此时可以对启动脚本做一些手脚,将:

替换为:

同时IDEA中进行Remote Debug设置:
org.apache.spark.launcher.Main入口处打上断点,执行任务提交并启动IDEA针对Spark源码调试设置的的Remote Debug:
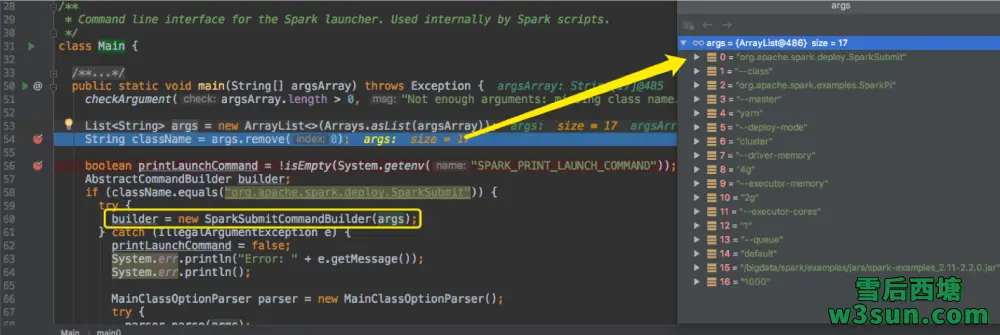
在将org.apache.spark.deploy.SparkSubmit从args移除后才是用户设置的完整参数列表,涵盖–master,–driver-memory,–queue等参数。Spark会通过org.apache.spark.launcher.SparkSubmitCommandBuilder结合args中现存的用户设置参数进行最终执行命令的构建工作,首先可以概览一下SparkSubmitCommandBuilder继承关系图:
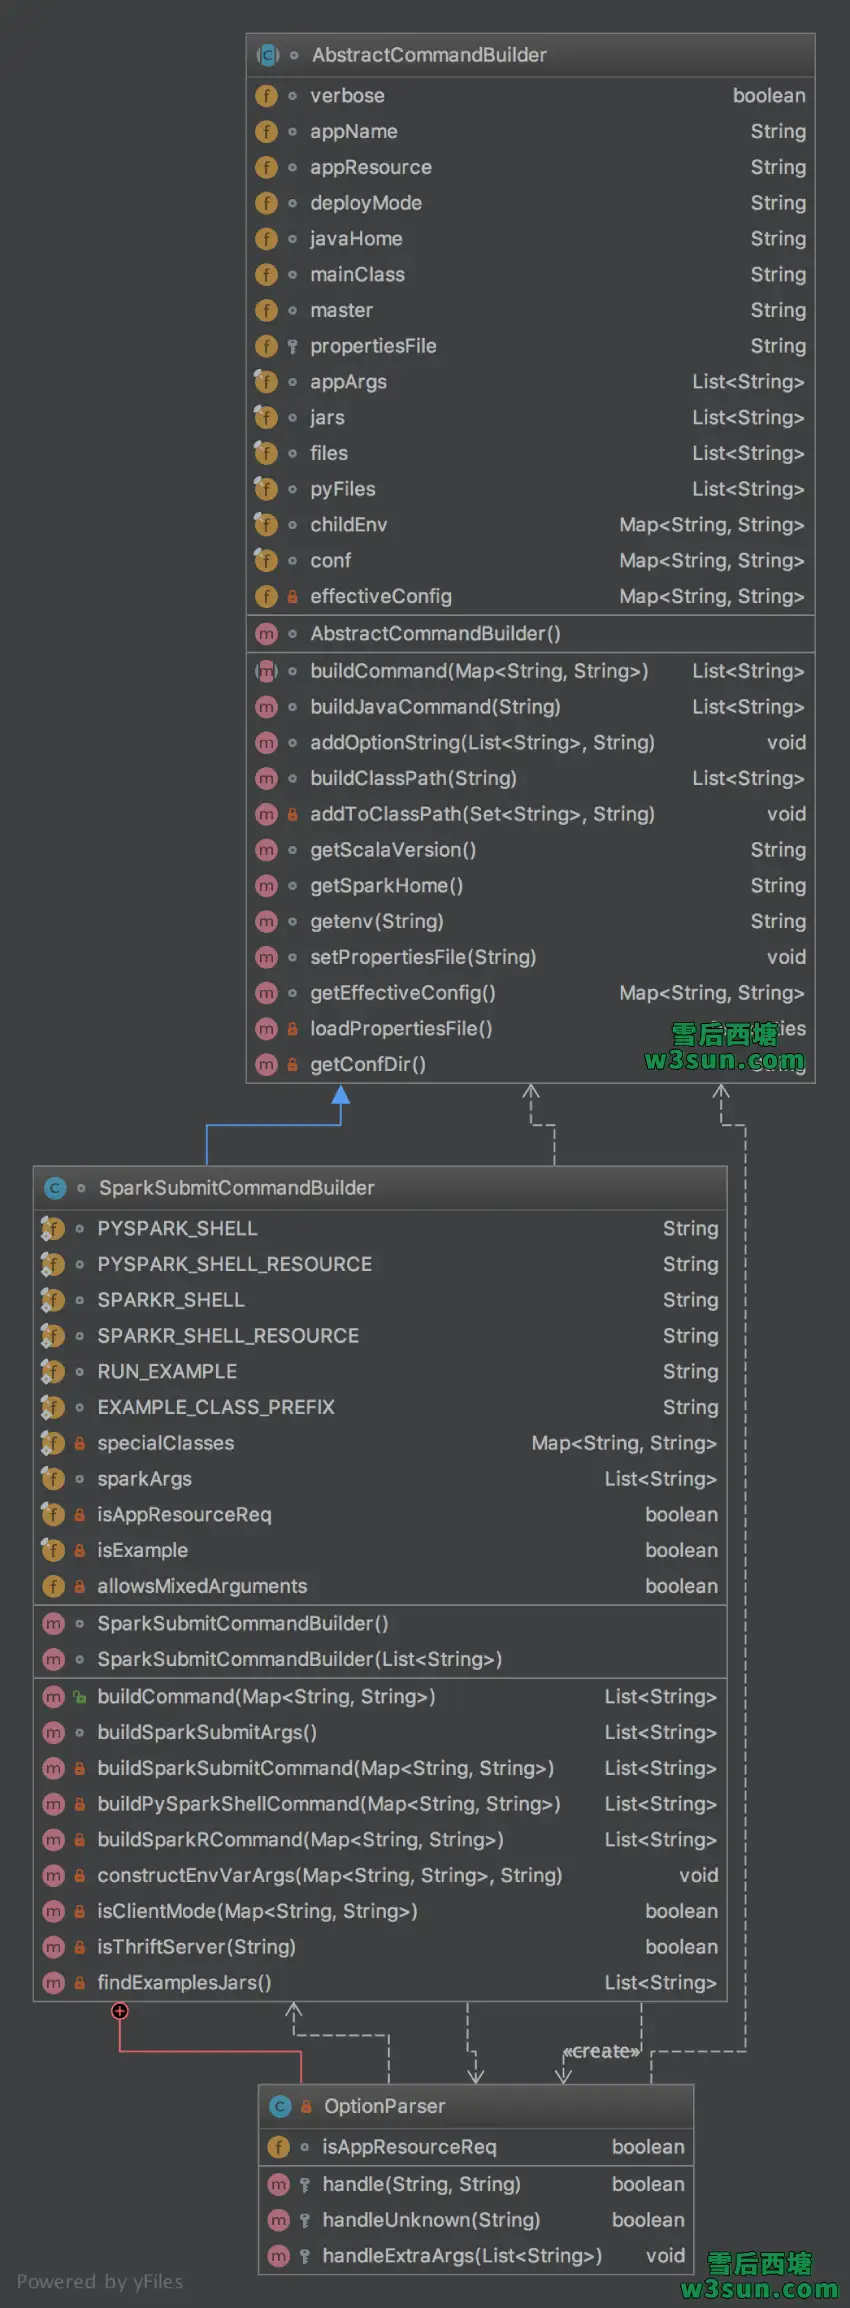
可以看到其实用户设置的参数会被赋值成appName,appResource,deployMode,javaHome,mainClass,master等参数,解析过程也比较简单:
- 通过args初始化SparkSubmitCommandBuilder
- SparkSubmitCommandBuilder构造方法中通过OptionParser对用户参数进行解析
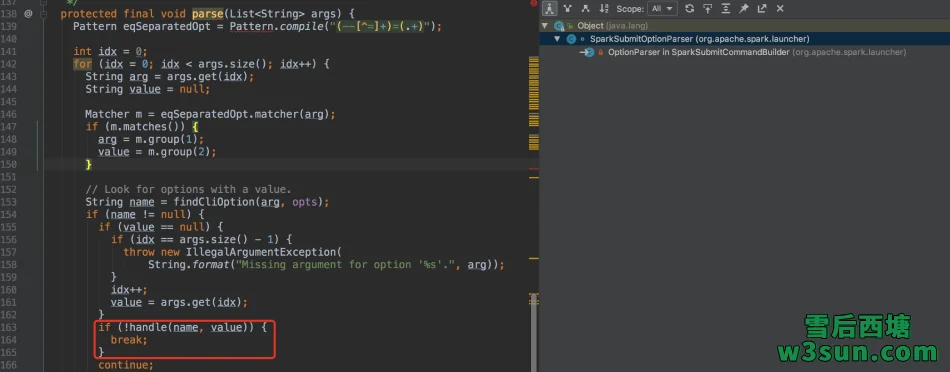
- OptionParser基类中的parse方法负责基本解析时会将–master yarn之类用户设置的参数解析出来,并调用OptionParser中重写的handle方法进行进一步赋值


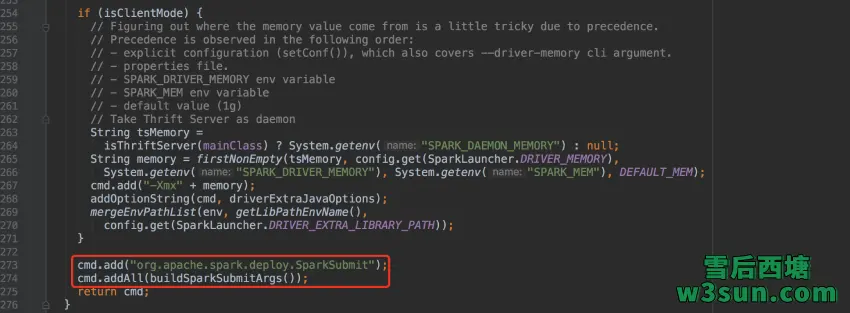
当SparkSubmitCommandBuilder实例构造完毕后,用户参数也就完成了解析和校验过程,同时org.apache.spark.launcher.AbstractCommandBuilder中的成员变量也会完成相应的初始化,在执行SparkSubmitCommandBuilder实例在执行public List<String> buildCommand(Map<String, String> env)会将org.apache.spark.deploy.SparkSubmit重新加回都参数列表,并且会将解析后的参数进行追加。
重新回归到org.apache.spark.launcher.Main,为了对比参数解析和预期是否一致,可以通过在IDEA中将printLaunchCommand值设置为true进行打印:
Map<String, String> env = new HashMap<>();
List<String> cmd = builder.buildCommand(env);
if (printLaunchCommand) {
  System.err.println("Spark Command: " + join(" ", cmd));
  System.err.println("========================================");
}

if (isWindows()) {
  System.out.println(prepareWindowsCommand(cmd, env));
} else {
  // In bash, use NULL as the arg separator since it cannot be used in an argument.
  List<String> bashCmd = prepareBashCommand(cmd, env);
  for (String c : bashCmd) {
    System.out.print(c);
    System.out.print('\0');
  }
}


至此,任务提交脚本及参数校验、整理过程执行完毕,可以看到,Spark在真正开始任务提交之前对参数进行了较为苛刻的校验和整理过程,期间出现错误参数随即抛出异常而退出。
Spark On Yarn任务提交流程解析
此外在spark-submit提交任务时,我们可以在另一个terminal窗口中执行:
netersdeMacBook-Pro:yidianlogin neters$ while true
> do
> ps aux|grep java
> sleep 1
> done
neters           27249 150.5  1.4  7883224 116600 s004  R+   11:05下午   0:01.17 /Library/Java/JavaVirtualMachines/jdk1.8.0_181.jdk/Contents/Home/jre/bin/java -cp /bigdata/spark/conf/:/bigdata/spark/jars/*:/bigdata/hadoop/etc/hadoop/ org.apache.spark.deploy.SparkSubmit --master yarn --deploy-mode cluster --conf spark.driver.memory=4g --class org.apache.spark.examples.SparkPi --executor-memory 2g --executor-cores 1 --queue default /bigdata/spark/examples/jars/spark-examples_2.11-2.2.0.jar 10000
即可抓取到具体语句,通过加入Debug参数可以进一步深入源码中进行调试和分析,同时需要在org.apache.spark.deploy.SparkSubmit打上断点:
/Library/Java/JavaVirtualMachines/jdk1.8.0_181.jdk/Contents/Home/jre/bin/java \
-agentlib:jdwp=transport=dt_socket,server=y,suspend=y,address=5005 \
-cp /bigdata/spark/conf/:/bigdata/spark/jars/*:/bigdata/hadoop/etc/hadoop/ \
org.apache.spark.deploy.SparkSubmit \
--master yarn \
--deploy-mode cluster \
--conf spark.driver.memory=4g \
--class org.apache.spark.examples.SparkPi \
--executor-memory 2g \
--executor-cores 1 \
--queue default \
/bigdata/spark/examples/jars/spark-examples_2.11-2.2.0.jar \
10000

跟进后就可以看到熟悉的Spark Logo躺在这里,同时还存在一些部署模式、集群管理器,PySpark等相关变量定义:

当把org.apache.spark.launcher.Main解析后的参数传递给org.apache.spark.deploy.SparkSubmit时后者也会对传入参数进行第二遍校验和变量赋值,此时上述工作是由org.apache.spark.deploy.SparkSubmitArguments来负责执行,通过其定义:

可以看到在解析的过程中Spark会从通过:
def env: immutable.Map[String, String] = immutable.Map(System.getenv().asScala.toSeq: _*)
从环境变量中获取一些变量,其实会获取大量和Spark相关的参数,对于某些场景来着这可能不是太好的处理方式。随后通过继承关系我们可以看到org.apache.spark.launcher.SparkSubmitOptionParser#parse又被用于进行基础参数赋值,和第一步解析不同的是,此时作为接收任务提交参数的变量都是org.apache.spark.deploy.SparkSubmitArguments的成员:

在本轮参数解析过程中,分别涉及到参数赋值,读取spark-defaults.conf中的配置,忽略非”spark.”开头的(K,V)变量设置,加载环境变量,校验其他参数等。在SparkSubmitArguments创建实例的过程中同时完成了相关解析:

以validateArguments为例:
/** Ensure that required fields exists. Call this only once all defaults are loaded. */
  private def validateArguments(): Unit = {
    action match {
      case SUBMIT => validateSubmitArguments()
      case KILL => validateKillArguments()
      case REQUEST_STATUS => validateStatusRequestArguments()
    }
  }

  private def validateSubmitArguments(): Unit = {
    if (args.length == 0) {
      printUsageAndExit(-1)
    }
    if (primaryResource == null) {
      SparkSubmit.printErrorAndExit("Must specify a primary resource (JAR or Python or R file)")
    }
    if (mainClass == null && SparkSubmit.isUserJar(primaryResource)) {
      SparkSubmit.printErrorAndExit("No main class set in JAR; please specify one with --class")
    }
    if (pyFiles != null && !isPython) {
      SparkSubmit.printErrorAndExit("--py-files given but primary resource is not a Python script")
    }

    if (master.startsWith("yarn")) {
      val hasHadoopEnv = env.contains("HADOOP_CONF_DIR") || env.contains("YARN_CONF_DIR")
      if (!hasHadoopEnv && !Utils.isTesting) {
        throw new Exception(s"When running with master '$master' " +
          "either HADOOP_CONF_DIR or YARN_CONF_DIR must be set in the environment.")
      }
    }

    if (proxyUser != null && principal != null) {
      SparkSubmit.printErrorAndExit("Only one of --proxy-user or --principal can be provided.")
    }
  }
可以看到Spark是会检测HADOOP_CONF_DIR或者YARN_CONF_DIR设置的。org.apache.spark.deploy.SparkSubmit#main可以看到在完成参数解析后,Spark会通过org.apache.spark.deploy.SparkSubmitArguments实例中action进行模式匹配,并选择相应的处理逻辑:
override def main(args: Array[String]): Unit = {
  val appArgs = new SparkSubmitArguments(args)
  if (appArgs.verbose) {
    // scalastyle:off println
    printStream.println(appArgs)
    // scalastyle:on println
  }
  appArgs.action match {
    case SparkSubmitAction.SUBMIT => submit(appArgs)
    case SparkSubmitAction.KILL => kill(appArgs)
    case SparkSubmitAction.REQUEST_STATUS => requestStatus(appArgs)
  }
}
在org.apache.spark.deploy.SparkSubmit#submit中,会首先为任务提交准备一些设置,包括根据运行模式设定和与之对应的childMainClass:
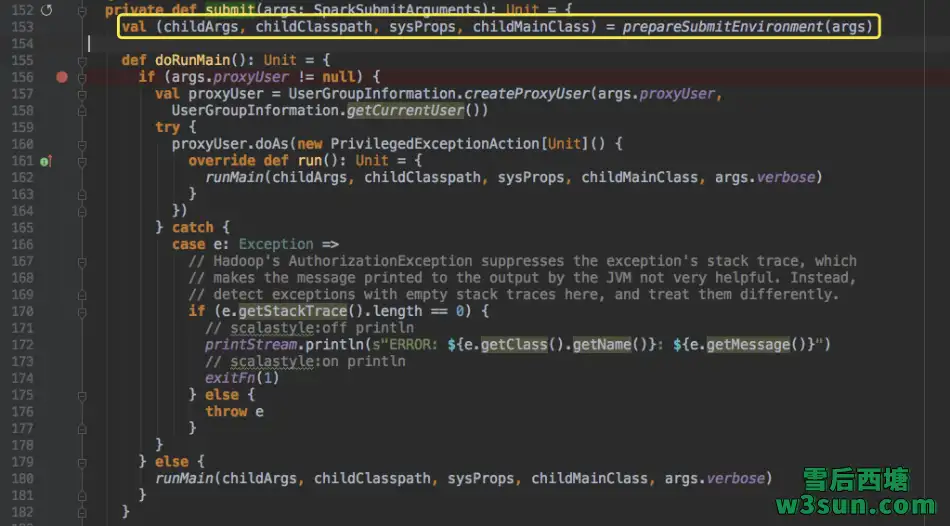
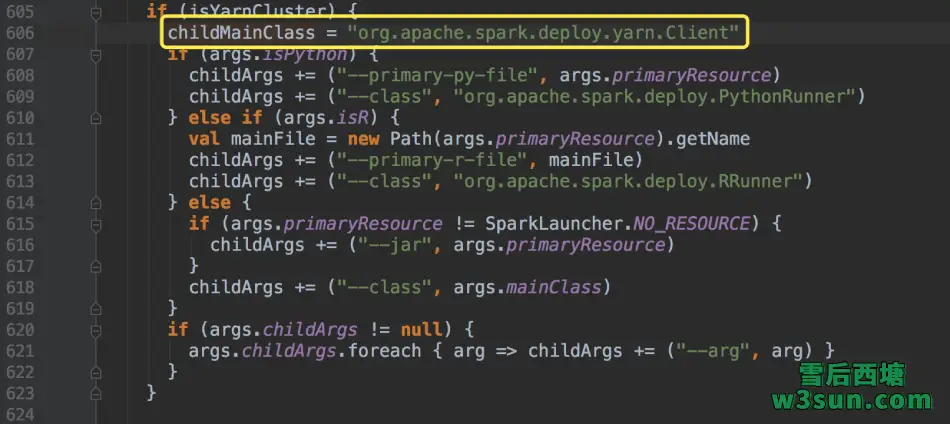
因为本文采用的Spark On Yarn的cluster模式进行任务提交,因此选择org.apache.spark.deploy.yarn.Client作为其childMainClass,等待剩余childArgs, childClasspath, sysProps参数获取完毕即执行org.apache.spark.deploy.SparkSubmit#runMain:
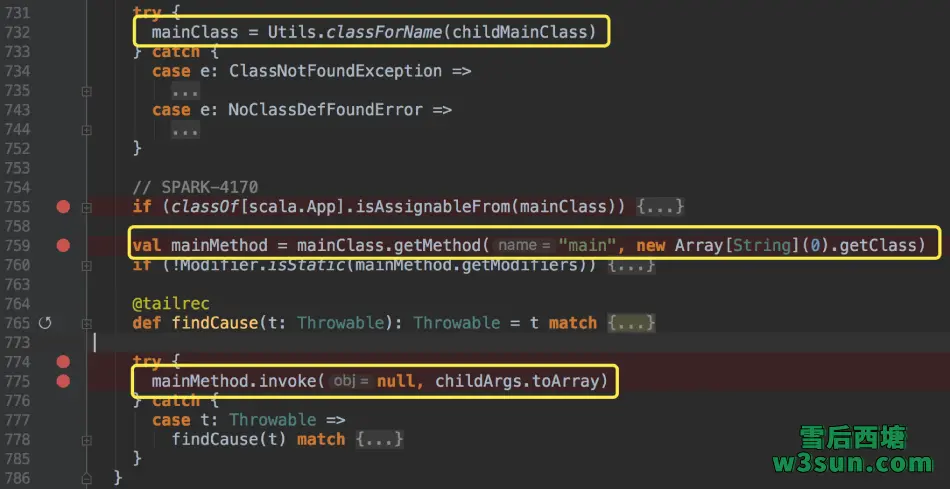
通过反射运行org.apache.spark.deploy.yarn.Client#main方法:

可以看到任务提交过程中打印到控制台的用户jar包别名,临时文件目录等信息,由于scala中类和伴生对象可以互访彼此成员,因此在执行期间彼此进行任意调用。org.apache.spark.deploy.yarn.Client#run调用中,首先会通过org.apache.spark.deploy.yarn.Client#submitApplication实现任务提交,提交完毕Spark会通过多个分支对应用的运行状态进行汇报:
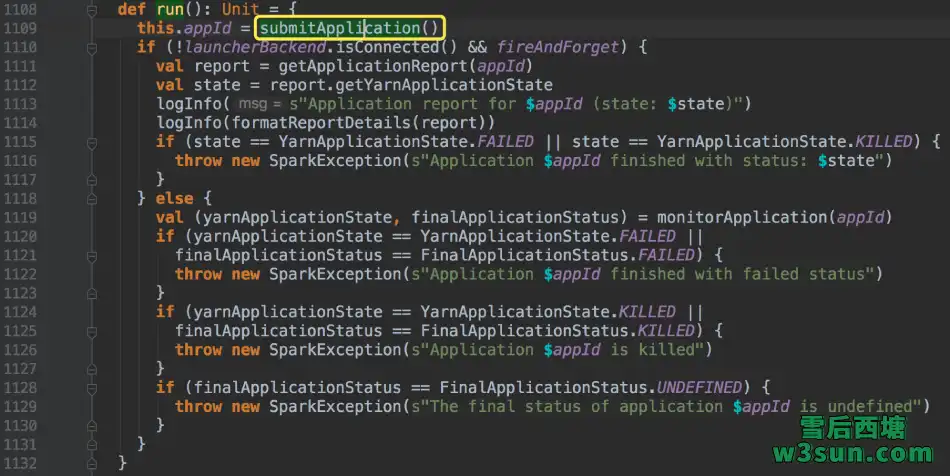
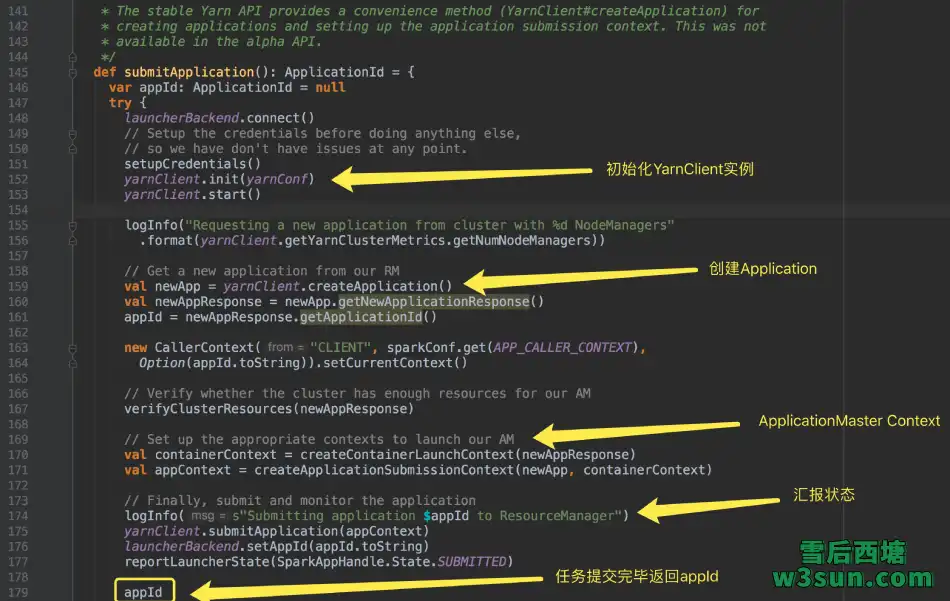
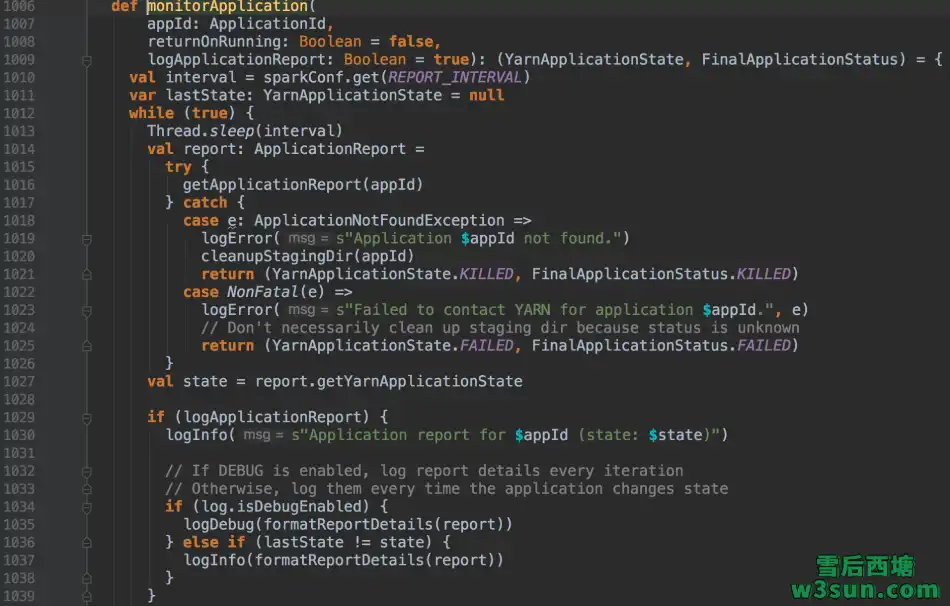
至此appId返回,Application提交成功,至于状态监控可以基于ApplicationId通过YarnClient实例来实现,Spark也是如此实现的:
转载请注明:雪后西塘 » Spark On Yarn Cluster任务提交流程分析